Requirements:- YubiRadius version 3.5 or later virtual appliance from Yubico to handle the dual factor authentication part
- Yubikeysfor each person connecting
- Juniper Netscreen SSG 140 running ScreenOS v6.2.0 (any ScreenOS netscreen should work)
- Fixed external IP address for this Juniper firewall
- Shrewsoft VPN Client (Free, open source and works the same on Windows and Linux).
- Windows SBS 2003 domain controller. This should work with any Windows domain controller, LDAP server or anything else YubiRadius can connect to
Description:This How To covers setting up a Juniper Netscreen firewall to allow users to connect via VPN using dual factor authentication with Yubikeys. I am assuming that you already have a windows domain with users and that you have already got the YubiRadius appliance connected to this successfully. First I will walk through all the settings required on the firewall side. Then I'll go through all the settings in Shrewsoft VPN Client to enable this client to connect to the VPN.
I'm assuming that you are already familiar with the ScreenOS web based interface and how to setup policies to control access. If not then you can probably work a lot of it out following this guide but you will likely need to look online to fill in the gaps. I am also going to go through this guide using the web based GUI - you can also do all of this using an ssh connection to the firewall if you know the commands but that would have been a far less colourful howto...
 Tutorial:The building blocks
There are some things you will need setup before you start pulling together the VPN itself:
- Firstly you will need a working firewall with some of your computers on one side and the Internet on the other. Fairly obvious but if you have not managed this yet then the VPN isn't going to work very well.
- You will also need a working YubiRadius system set-up. You can download the virtual appliance and guide from HERE. The guide is excellent with lots of screenshots and explanations, so I don't think me trying to explain it again will help.
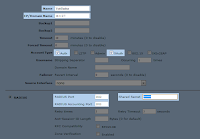
- Add the YubiRadius auth server to the firewall under Configuration->Auth->Auth Servers. You need to give it a name, enter the YubiRadius server IP address in the "IP/Domain Name" box, tick account types "auth" and "XAuth". Select the "Radius" radio button, set the Radius port to 1812 and the Radius Accounting Port to 1813 then enter your shared secret from the YubiRadius server.
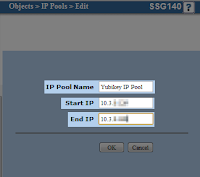
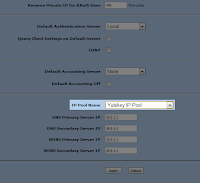
- IP Pools: Because we are authenticating our users using an external Radius server the ScreenOS firewall can not assign different local IP Pools to them - all YubiRadius users will get the default IP pool so make sure it is large enough for all your users and set it as default under VPNs->Autokey Advanced->XAuth Settings. If you REALLY want different IP pools then you will need to use the ip pools in the YubiRadius server - try google searches for "freeradius main_pool" to get started.
- User accounts: Individual user accounts are pulled directly from Active Directory by the Radius server so there is no need to create user accounts on the firewall itself
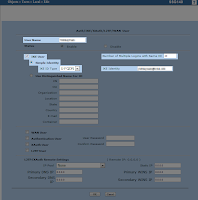
- Gateway user account: Create one "user account" to act as a group identifier (under Objects -> Users -> Local). Set the user name to something generic that describes the users eg "VPNAccounts" . Tick IKE user, simple identity with type U-FQDN and stick "VPNAccounts@yourdomain.com" in the IKE identity box - it does not have to be a real email address as its only used as an identifier not for sending emails. Set the number of multiple logins to the max simultaneous users you will have for this group or higher and leave everything else blank.
- Local groups: Under "Objects->Users->Local Groups". Create one new group called "VPN Accounts Group". Put your gateway user account in this group. The gateway group should show as group type "ike" not "ike auth" - if it shows "ike auth" then you need to check the user account settings.
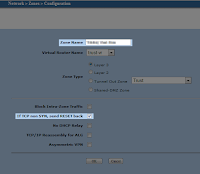
- Create a zone for this VPN group under Network->Zones. Tick "If TCP non SYN, send RESET back" and leave the rest as it is (trust-vr, layer 3 - if you want something other than trust-vr you will already know about it). Call it something like "VPN Accounts Zone"
- Create a tunnel interface: Go to Network->Interfaces and create a new Tunnel IF. Give it an interface number and remember it. Choose the zone you created in the last point in the Zone(VR) dropdown. Set it as unnumbered and choose the interface you want it to be assigned to - the interface your servers for those clients on is fine.

With all that done we can start pulling the actual VPN together.
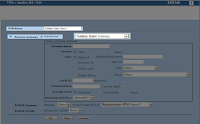
- Create the Gateway under "VPN's->Autokey Advanced->Gateway".
- Give the Gateway a sensible name eg "VPN Accounts Gateway"
- Use version IKEv1, select "Remote Gateway, Dialup User Group" and choose your "VPN Gateway Group" then click the Advanced button.
- Under Advanced leave the "IKEv2 Auth Method" section blank.
- Enter a "Preshared Key" - this is effectively a shared password for all users of this group (don't worry they also need their user password and Yubikey). Leave "Local ID" and seed blank and for the outgoing interface choose the public interface of your firewall. This last bit is important as after saving you can not change the outgoing interface - its not even obvious it is a setting so I went round in circles for ages before realising I'd set it incorrectly...
- Set the security level to user defined (custom) and set one of the "Phase 1 Proposal" dropdowns. This is the encryption scheme used for setting up the first part (AKA Phase 1) of the VPN. The various options represent different mixes of performance and security, for testing any should be fine but you might want to read up on them if you need an extra secure setup. If you select more than one setting here the client could use any but I keep it simple by only allowing one.
- Mode initiator set to Aggressive
- Enable NAT-Traversal so that the VPN works for people behind a NAT device (eg most home users)
- Hit Return and OK to save and close.
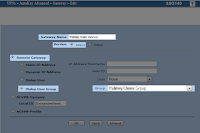
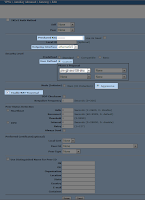
- Next to your Gateway you have an edit link (to change the settings above) and an Xauth link. Click this Xauth Link now.
- Select "XAuth Server", set "Allowed Authentication Type" to Generic
- Select "External Authentication" and choose your YubiRadius server in the drop-down. If you are looking to get your IP address from the freeRadius service instead of a local IP Pool on the firewall then tick "Query Remote Setting" - however I used local pool so left this unticked.
- Hit OK to close and save. Now your gateway is set to require a peshared key and also a valid password/Yubikey combination from the YubiRadius server.

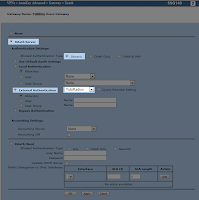
- Phase 2 Setup: Now we need to setup the second phase of the VPN. Go to "VPN's->Autokey IKE" and click New.
- Give the phase 2 settings a sensible name eg "VPN Accounts Phase 2"
- Select "Remote Gateway", "Predefined" and choose your gateway setup above eg "VPN Accounts Gateway"
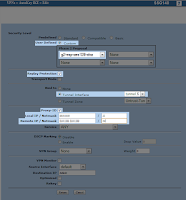
- Click Advanced and for "Security Level" choose "User Defined -> Custom" and in the first dropdown select one of the encryption options. As with this setting in the Gateway setup the specifics are not too important for testing but you will want to read up on them if paranoid.
- Tick "Replay Protection"
- Bind to -> Tunnel Interface and select the tunnel you created as the last part of the building blocks section above.
- Tick Proxy-ID
- Local IP/Network - set this to cover all your local subnets
- Remote IP/Netmask - set this to 255.255.255.255 / 32 (Basically allow any remote IP address to connect)
Congratulations! The VPN is now setup! Unfortunately as you might have guessed from the length of this post remaining we are not quite finished. We still need to setup the policies to allow our users to actually DO anything when they are connected, and then we need to setup the client (Shrewsoft VPN) to make the connection.
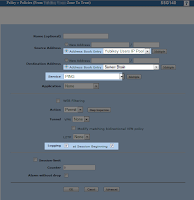
Policy SetupThe policies that you setup will largely depend on what you want your VPN users to be allowed to do. For this test I have just created a policy to allow ping to one of my servers. Remember to select the correct zone when you create the policy (from these examples it was "VPN Accounts Zone") and select your IP Pool range as the source address (you will need to create this again under policy->policy elements->Addresses->List in order to select it in the policy setup). Select your destination address and choose "Ping" as the service. Turning on logging at session beginning can really help with troubleshooting too.
If you are not worried about what the VPN users can do you could set the service to "Any" which will let them do anything they want. Personally I always prefer starting with very restrictive settings and opening up as required.
 Client Setup
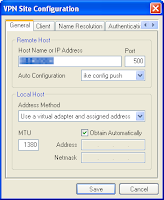
The Shrewsoft VPN client works really reliably but the setup screens are not the most pleasing on the eye - since you only have to look at them once this is not a big problem though and it is free Open Source software so no licencing hassles. Once you have setup the connection on one machine you can export and import it to other machines (including between Windows/Linux hosts). I've included screenshots of every tab below, just remember the settings you enter here must match exactly the settings from the advanced gateway (Phase 1) and advanced phase 2 sections above.
Host name or IP address is the external IP address of your Netscreen firewall device. UFQDN String is the email address you entered for the gateway user account waaay up near the top of this guide. Remote network resource must match the subnet you entered in the Phase 2 Advanced screen for Local IP.
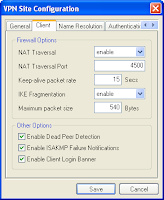
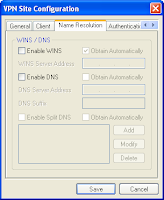
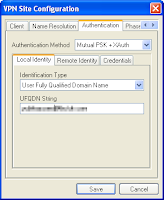
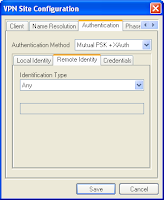
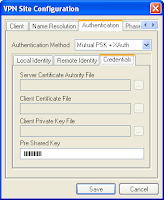
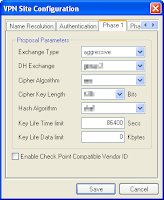
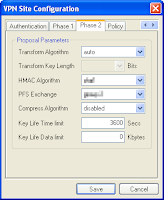
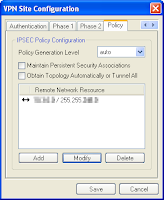
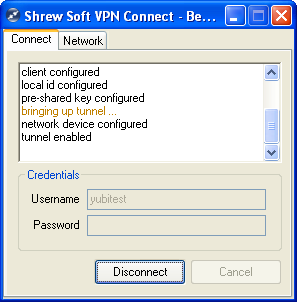
With all that correct you should be able to enter your username and password from the domain then add the Yubikey token at the end of your password and get a connection on the VPN. Unless you have already created extra policies you will only be able to ping one server so far but adding policies to allow more is easy once the basics are working.
 Next Steps:
You now have a fully working dual factor auth VPN using a Netscreen firewall and Yubikeys. If you want to add another group of users with different policies then all you need to do is follow this guide again from the gateway user account (gateway user, gateway group, zone, tunnel, gateway, xauth, phase 2, policies). The one downside of this is that the only thing which differentiates the two groups is the gateway user email address and pre shared key - since they are all authenticating against the same YubiRadius server a user could jump groups by entering a different email & pre shared key. Not a big concern unless you expect your users to be trying to cause trouble. One way around this would be to have a separate YubiRadius appliance for each group of users/VPN set-up. A bit of a hack but since each YubiRadius appliance is only 5GB hard drive and 256MB of memory it is not much of a system overhead on your virtualisation host servers.
The Netscreen can restrict authentication to users in a specified group on the external radius server, however I have not yet managed to get this to work with YubiRadius. This would be a better way to deal with the above problem if anyone can get it working.
To add users you just need to add a Yubikey to their account in the YubiRadius web management pages. Or if you selected auto provisioning just give them an unused Yubikey, setup the VPN client and explain how to log on - then they will automatically be linked with the Yubikey the first time they use it.
Troubleshooting:- On the Netscreen check under Reports--> System Log --> Event for errors. The error messages themselves are often cryptic and misleading however you can search for them to find other people fixing the same issues.
- In Linux (Ubuntu 11.10 and Mint 12 at least) there is a bug in the version of Shrewsoft VPN that prevents it connecting. The buggy version is 2.1.7 - getting the 2.1.5 version from the repositories for Ubuntu 10.10 and installing that instead fixes the problem. The two packages you will need to downgrade are "ike" and "ike-qtgui", both need to be version 2.1.5 for it to work.
- In Linux there is another issue with the VPN connecting but not passing traffic. A fix is described HERE. Basically Linux detects traffic returning on an interface that it did not leave on, assumes its an attack and blocks it.
Any comments, queries or suggestions please let me know.
Cheers,


